

Bone cleaning and Preparation
Bones carry stories long after the body is gone-quiet relics shaped by time, nature, and the unique beauty of decay. Cleaning and preparing them is a slow, meditative craft that blends biology with ritual, patience with respect. This guide will help you understand the full process, whether you're beginning your journey or refining your technique.
Rehydration (The Gentle Revival)
Not every specimen arrives fresh. Some bones are dried out, stiff, or brittle — especially older finds or pieces exposed to the elements. Rehydration is the first act of care, softening what time has hardened so the rest of the process can unfold without damage.
How to Rehydrate Bones
- Submerge bones in room‑temperature water
- Add ⅓ cup of soda ash per gallon of water
- Let soak for 12–48 hours, depending on dryness
- Check periodically for flexibility
- Once tissues loosen and bones feel pliable, move to fleshing or maceration
Why Soda Ash Helps
Soda ash gently raises the pH of the water, encouraging dried tissue and connective fibers to release without harming the bone. It’s a quiet, effective way to prepare older or weathered specimens for deeper cleaning.
When Rehydration Is Necessary
-
Bones feel chalky or brittle
-
Joints refuse to separate
-
Tissue is dried, leathery, or stuck tight
-
You’re working with older finds or previously cleaned specimens
Rehydration is a soft beginning — a way of honoring the bones before the more intensive work begins.
Fleshing
Fresh finds require a different start. When tissue is still soft, skip rehydration entirely and begin with fleshing.
Start With Fleshing
-
Use a scalpel, knife, or forceps
-
Remove as much muscle and skin as possible
-
Work slowly and respectfully
-
Avoid scraping too hard — fresh bones can scratch
-
Focus on large muscle groups first
-
Leave delicate areas for maceration to finish
Fresh animals often require multiple fleshing sessions. As maceration softens deeper tissue, you’ll return to the specimen again and again, removing layers until the bones begin to reveal themselves.
Maceration
Maceration is the natural decomposition of remaining soft tissue using warm water. It’s slow magic — a rhythm of patience and unveiling.
How Maceration Works
-
Submerge the specimen in room‑temperature water
-
Keep the container covered to reduce odor
- Tip: Either get a black bucket or spray paint the bucket black to keep it warm
-
Change water every week
-
Allow natural bacteria to break down tissue
-
Continue until bones are fully exposed
Maceration Is a Cycle
Most specimens require multiple rounds of maceration and fleshing:
flesh → macerate → flesh → macerate
This rhythm can take weeks to months, depending on the size and condition of the animal.
Tips
- Try to get the most flesh off the bone, it will decrease the amount of time significantly
- Either get a black bucket or spray paint the bucket black to keep it warm
- Drill a small hole in the top of your buckets. As the bones macerate, they produce gases.
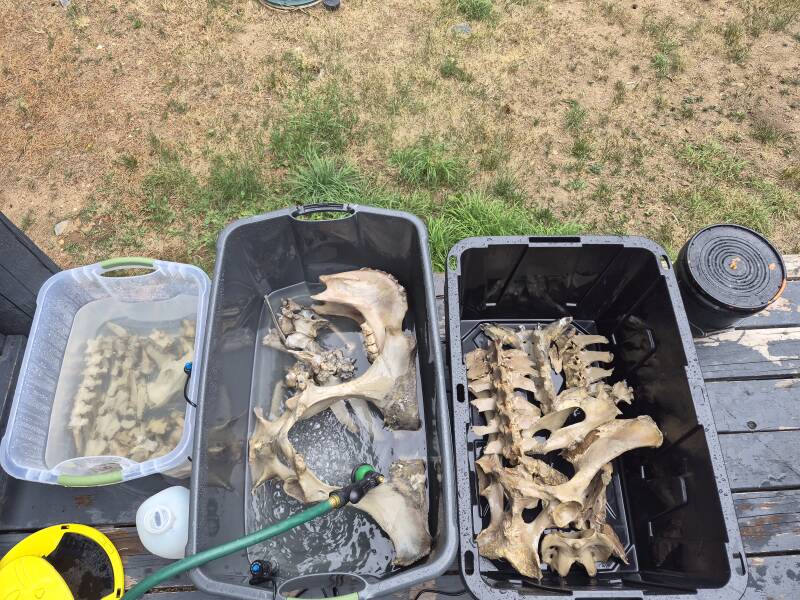
This is what my maceration buckets look like as of now. This has been two months of maceration. This is a long process, especially when working with larger animals.
OR Dermestid Beetles
Sometimes maceration takes its time — especially with larger animals, colder environments, or specimens with dense muscle. When water and bacteria need help, dermestid beetles offer a beautifully efficient alternative.
These tiny, diligent insects are nature’s own cleaners, removing flesh with remarkable precision while leaving bone structure untouched.
When to Choose Beetles Instead of Maceration
- Maceration is moving too slowly
- You want to avoid strong odors
- The specimen has thick or stubborn tissue
- You prefer a cleaner, more controlled process
- You’re working with memorial pieces where precision matters
How Beetle Cleaning Works
- Place the specimen into a healthy beetle colony
- Allow the beetles to remove remaining flesh
- Check progress daily
- Remove bones once fully cleaned
- Rinse gently and move directly into degreasing
- Beetles often finish in days what maceration can take weeks to accomplish.
Important Notes
- Beetles must be kept warm and fed regularly
- Never use beetles on specimens exposed to chemicals (formalin, bleach, etc.)
- Bones may need a gentle rinse afterward
- Degreasing is still required — beetles remove flesh, not oils
Dermestids are a quiet collaboration with nature — a way of letting the natural world assist in revealing the bones beneath.
They are now your pets and need to be treated as such.
Degreasing
Bones naturally contain oils that can cause yellowing or tackiness. Degreasing removes these oils and prepares the bones for whitening.
Degreasing Options
-
Dawn dish soap — gentle and effective (personal favorite method)
-
Ammonia — stronger, excellent for stubborn grease (Never heat!)
-
Acetone — for advanced users only (Never heat!)
How to Degrease
-
Submerge bones in your chosen solution
-
Keep at room temperature
-
Change solution weekly
-
Continue until bones appear matte and no longer feel oily
Tips
- I personally just do the Dawn method. It is less harsh.
- When your bones are dry, you will be able to see dark yellow spots (if any are left). This is grease, and you need to repeat this process.
- If you do heat up your bones during this process, use medium heat. If the water gets too hot, the grease will become permanent. There is not turning back.
Whitening
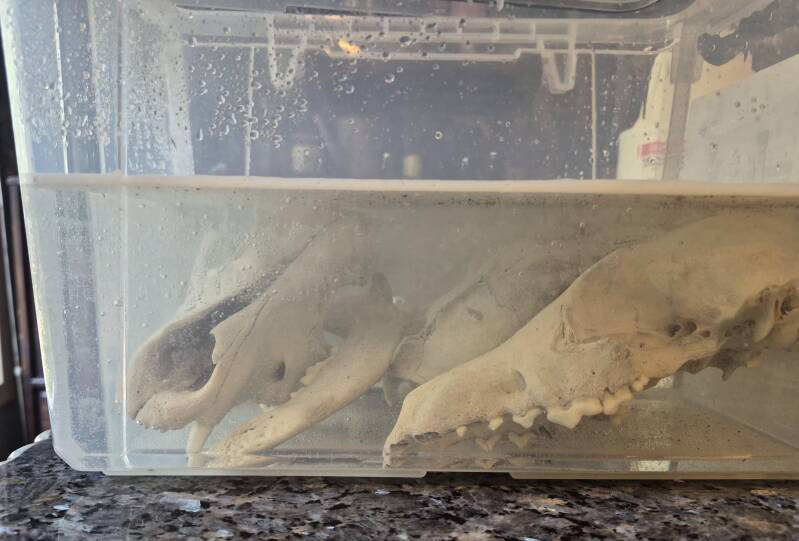
The beginning process of whitening.
Whitening brightens bones without damaging them. Use 12% hydrogen peroxide — never bleach.
* 12% hydrogen peroxide is strong and will burn your skin. Use eye protection and gloves. *
- Mix one part peroxide with three parts water 1:3 ratio
-
Submerge bones fully (different for antler and horn animals)
-
Leave for 6-8 hours
- Check every hour
-
Remove when bones reach desired tone
- Rinse
- Dry completely
Tips and notes
The hydrogen peroxide sterilizes the bones.
3% hydrogen peroxide will work; the process will just take longer.
.
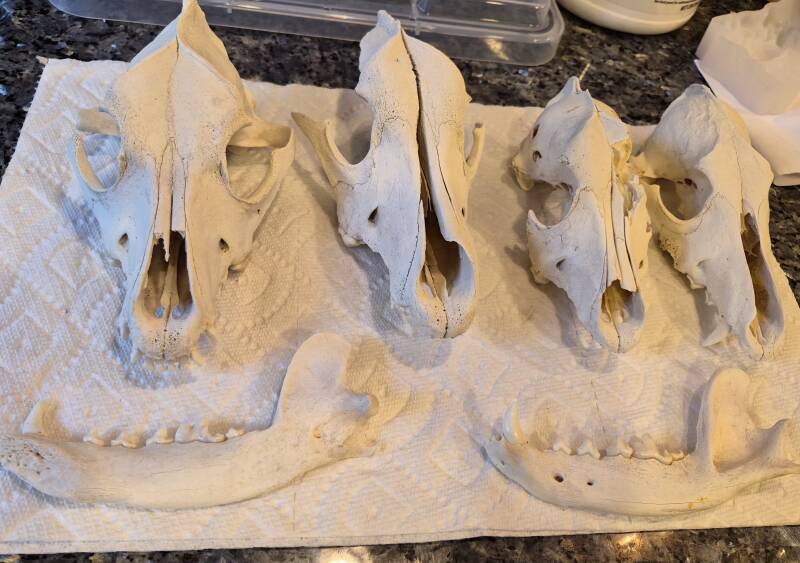
After they are done.
Bones cleaned by bones and blooms
Bones prepared here are handled with patience, precision, and deep respect for the creature they once belonged to. We use controlled maceration, careful degreasing, and gentle whitening methods to preserve natural texture without stripping away the story held in each surface. Your piece is crafted to endure — a relic of quiet beauty, shaped by science, ritual, and the art of letting nature speak for itself.
Bone cleaning is slow magic — a practice of listening, waiting, and honoring what remains. Whether you’re learning the craft or caring for a piece you cherish, I hope this guide helps you feel more connected to the quiet beauty held within every bone.
If you ever need guidance, reassurance, or help with a bone cleaning project, you’re always welcome to reach out. I answer every message with care and respect. You can also follow along on Instagram for behind‑the‑scenes work, preservation tips, and glimpses into the studio’s darker, more beautiful corners.
Create Your Own Website With Webador